Graphics in Airships are composed of two parts: the spritesheet and the bump map. The spritesheet image determines the basic colours of the image, while the bump map determines how they are lit up by light sources in-game.
Here's an example:
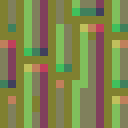
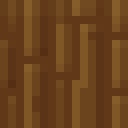
The spritesheet image of a light wooden armour tile:
![]()
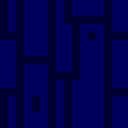
Its bump map, and each of the three colour channels in it:


Different ways it can look like in-game:
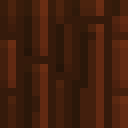

Note that the spritesheet image is literally just a brown square. All the texture in-game comes from the bump map.
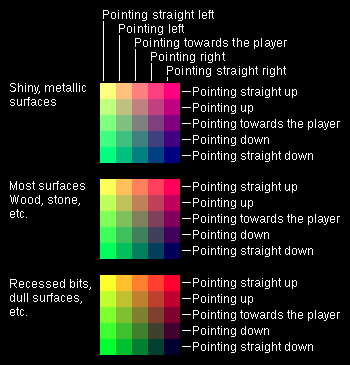
The bump map stores three pieces of information for each pixel: whether the surface is facing up or down, whether it's facing left or right, and how shiny the surface is. This information is stored in the red, green and blue colour channels of the image. For example, the redder a pixel is, the more strongly it gets lit up by light from above.
The game's graphics only use three values for the blue shinyness channel:
 128: shiny metallic things
 92: normal things
 48: dull or recessed things
And they use five values each for the red and green channels.
Red:
 255: pointing straight up
 192: pointing slightly up
 128: pointing towards the player
 64: pointing slightly down
 0: pointing straight down
Green:
 255: pointing straight left
 192: pointing slightly left
 128: pointing towards the player
 64: pointing slightly right
 0: pointing straight right
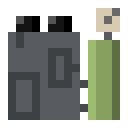
For example, a metal box:
![]()
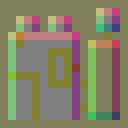
could have the following bump map:

The box is a more bluish colour than the surrounding area, because it's made of metal. Its top is more red, because it's facing upwards, its bottom is less red, its left is more green, and its right is less green.
Or the same image could be a cylinder with this bump map:

The best way to work with Airships' graphics is to install the GIMP image editor (yes, that's its name) and use the mod graphics template file for it. This lets you easily edit each colour channel of the bump map separately and then combine them.
But i that whole talk of channels doesn't make sense, you can also just think of the bump map as a simple image with a set of colours. Here is a complete overview of the colour values that appear on bump maps:
So to create a properly lit piece of art for Airships, you need to create both a 1024x1024 pixel spritesheet and a bump map of the same size that tells the game how to light the spritesheet. Beyond that, if you want the graphics to fit with the rest of the game, you should use the game's graphics palette:

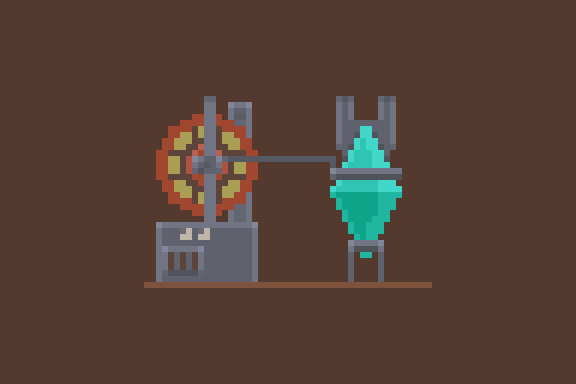
This is a fairly simple palette, but remember: these are only the base colours of things. All the light and shadow in the game derives from the bump map. So, for example, if you want to make a machine with some panels, don't draw this:
Draw this:

And then use this bump map, and the lighting system will take care of it:
One last thing needs covering: fragment maps. These are specific to module and armour tile graphics and are used to indicate how a module or tile will break apart into pieces. Each contiguous area of the same colour turns into one fragment, and white areas are ignored. So, for example, if the machine from above has a fragment map like this:
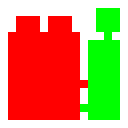
it will break apart into two halves, with the tank going one way and the machine going the other.
Or if the fragment map is like like this:
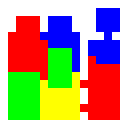
its panels will fall off independently, the rest of the machine will shatter into bits, and the tank will break in half.
Adding fragment maps to your modules will make destroying them look way more awesome, which is why you should do it.
Once you have these three images for your mod, you combine them into a "Spritesheet Bundle", by creating a file in your mod's SpritesheetBundle directory that looks something like this:
[
    {
        "name": "my_spritesheet",
        "bump": "my_bump",
        "fragments": "my_fragments"
    }
]
I hope this was a useful infodump. Go forth and mod, and feel free to message me with questions!