You will need:
- Membership in the Mod Developer Programme
- A copy of the newest Airships build and its source (the former costs $5, the latter becomes available once you are in the dev programme)
- NetBeans IDE
Gather the Files
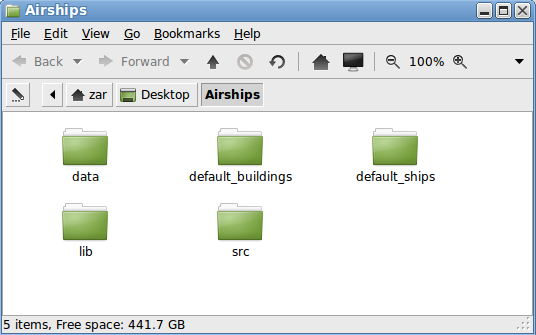
First, create a new folder called "Airships" or similar for the project. This is where NetBeans will store its stuff. Put the "src" folder from the source download into it. Then, copy the "lib", "data", "default_ships" and "default_buildings" folders from the game install into it. The result should look like this:
Project Setup
Now, start up NetBeans. Choose "New Project" from the File menu. Choose "Java project with Existing Sources" and hit Next.

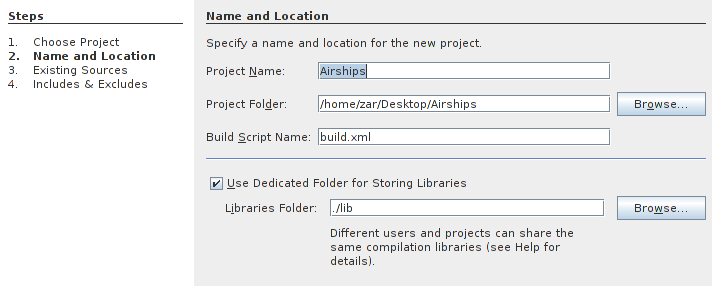
In the next screen, select the folder you set up earlier as the project folder. Tick "Use Dedicated Folder for Storing Libraries" and set "Libraries Folder" to "./lib" - which means it's going to use the lib folder in the project folder, where the libraries from the install are. Click next.
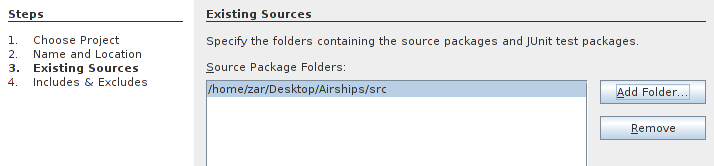
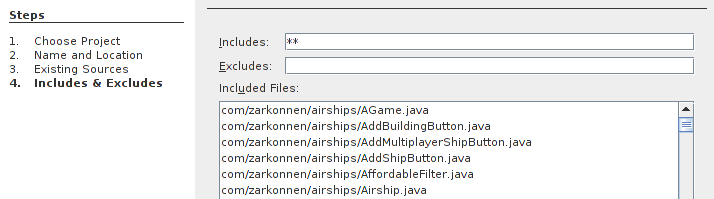
Now, add the "src" folder as a source package folder. Next.
The next screen should look something like this, listing various .java files:
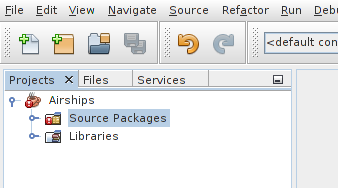
Click "Finish".
The Airships project should now appear in the panel on the left.
Libraries
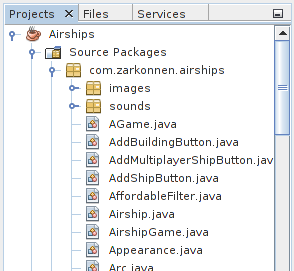
It will have an error icon, but that's just because you still need to explicitly add the libraries. Let's do that now. Right-click on the "Libraries" folder below the project and choose "Add Jar/Folder". In the file chooser that comes up, navigate to the lib folder and choose all files that end in .jar.

Hit OK, and NetBeans will chug for a moment, and then the errors should disappear. You can open the "Source Packages" folder and see the various Java classes that comprise the game.
Running the Game
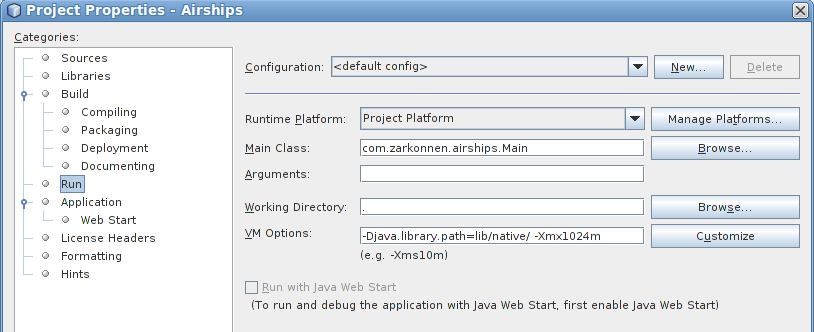
The final thing that needs doing is setting up the game to run. To do that, right-click on the project icon (the little red coffee cup) and choose "Properties". There, select the "Run" panel.
Browse for the Main Class and select "com.zarkonnen.airships.Main". For "Working Directory", put ".". (A single period.) For "VM Options", put "-Djava.library.path=lib/native -Xmx1024m". (These options mean "use the native OpenGL library bindings that are in lib/native" and "use up to 1 GB of RAM if needed.)
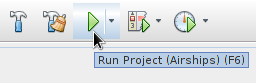
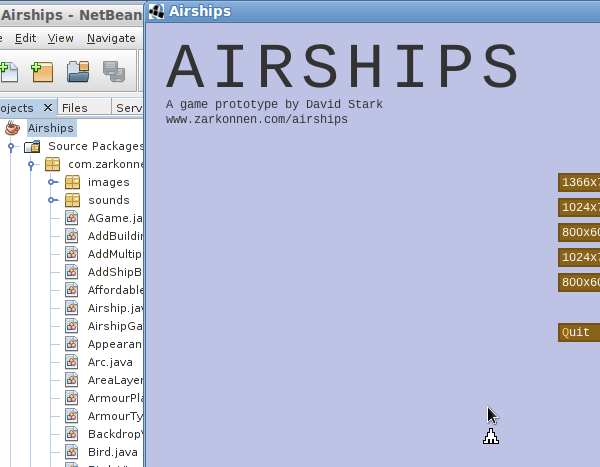
Hit OK and then press the big green triangle button to run the project. With any luck, the game should now start up.
That's it! You now have a working copy of Airships which you can mod to your heart's content. The basics of doing that, and how to distribute the mod, will be covered in another installment. For now, have a poke around, and join us on the forums if you have questions, comments, or ideas to share.
Addendum
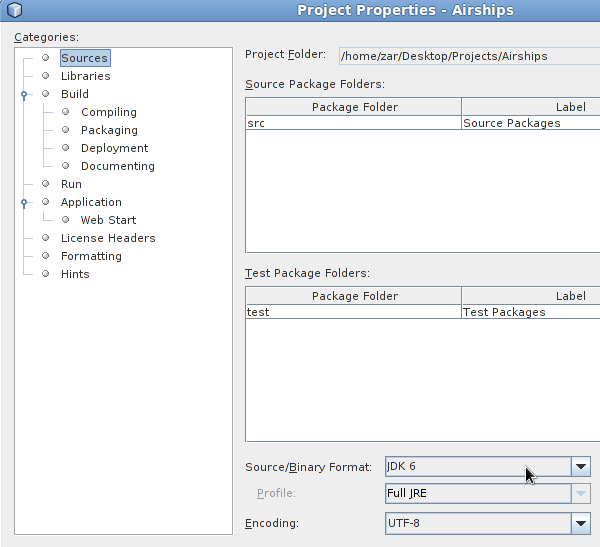
Also, set the Source/Binary format in the Project Properties to JDK 6. This ensures that the mods you create will be backwards-compatible with older machines: