Note that this guide assumes you're read part one.
How mods work
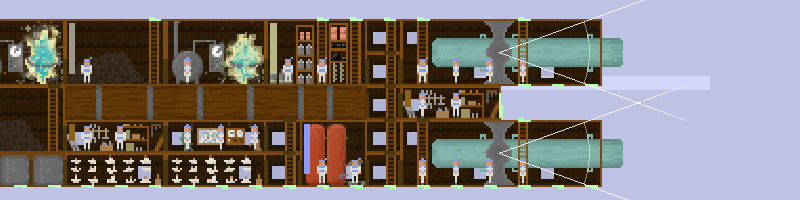
As a Java program, Airships is composed of class files that are loaded in when needed. By default, these classes reside in Airships.jar (which is visible in the main directory on Windows and Linux, and inside the Airships app bundle on Mac). A .jar file is really just a ZIP file which contains the class files. Java classes are arranged hierarchically. For example, the game's main menu is defined by the class com.zarkonnen.airships.MainMenu. Inside the Jar file, its class file is hence located at com/zarkonnen/airships/MainMenu.class.
Modding is possible because Airships has been set to prefer loading in replacement class files from the mods directory. So if there is a mods/com/zarkonnen/airships/MainMenu.class file, that file will be used instead of the original. This way, you can override existing functionality.
An Airships mod hence usually consists of a com folder that can be dropped into the mods folder to install it. Note that you should only distribute the class files that you have changed, rather than a complete, patched copy of the game! (Because the latter is technically speaking redistributing the game for free...)
A trivial mod
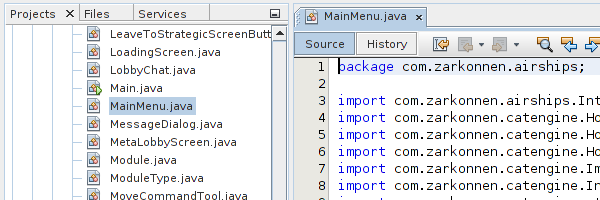
Let's try this out with the most trivial mod imaginable. Let's change the word "AIRSHIPS" in the main menu to "SHIPS OF THE AIR". To do so, open the MainMenu.java file in NetBeans:
Search for the all-caps word AIRSHIPS. In version 5.2, it's on line 514, but this will likely change in future versions.
Replace it with SHIPS OF THE AIR. The [333333] in front of it is a syntax used by the text rendering system, colouring the text a dark grey. You can ignore it. Or change it to [ff55ff] for a lurid purple.

Now save MainMenu.java and run the project.
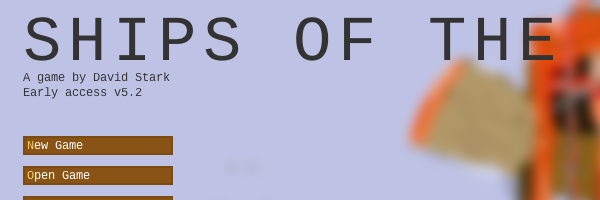
Behold! An altogether more silly-sounding title.
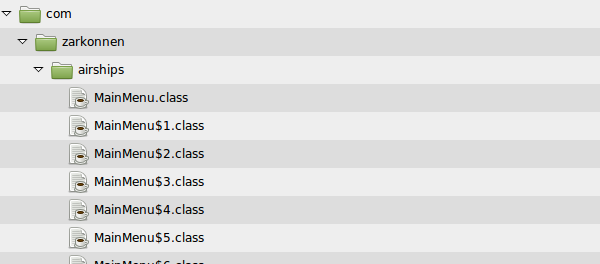
Of course, this isn't a mod yet. We've just modified our local copy of the game, but we want other people to enjoy our excitingly renamed version. To do this, we need to pick out the modified MainMenu.class file and put it into a normal copy of Airships. To do so, go into the build/classes folder in your project. Within that, in src/com/zarkonnen/airships, you will find... a whole bunch of classes called MainMenu! Apart from MainMenu.class, there's also MainMenu$1.class through MainMenu$31.class!
These additional files are for anonymous inner classes - little classes inside MainMenu that do things like listening for events. Take MainMenu.class and all of its little extra classes, and put them into a normal copy of Airships 5.2, into mods/com/zarkonnen/airships/.
Then launch your now-modded normal copy of Airships, and you should see the same change in the title.
The Imperial Cannon
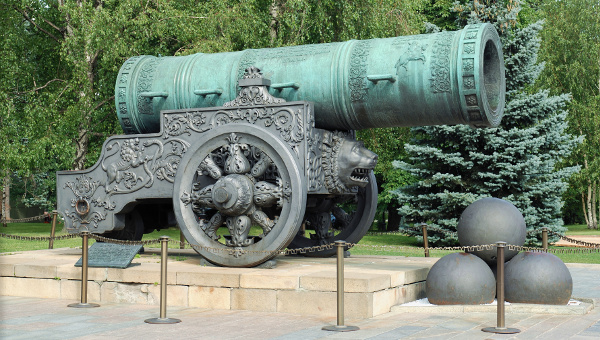
So that's how you create a mod, but this last one was hardly interesting. Let's create something fun: a mod that adds a giant cannon module. This weapon, inspired by the ludicrous Tsar Cannon, will be huge, heavy, expensive, slow-firing and not particularly accurate. But when it does hit, it is likely to tear smaller ships in half.
Let's get started. To add a new weapon module, we need to add a new entry to the ModuleType enum, where all the modules are defined. There's quite a lot of things that a new weapon module needs, but we can start out by just duplicating the existing entry for a heavy cannon and working from there.
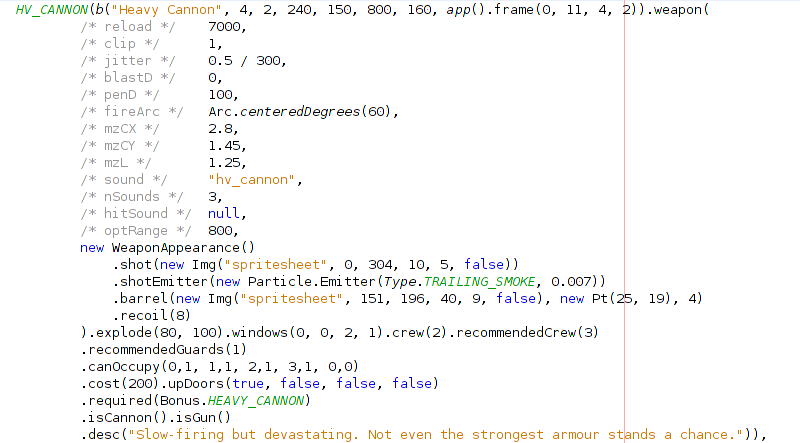
This is the definition for a heavy cannon. Let me walk through what each bit means.
- The first value,
"Heavy Cannon", is obviously its name. - Next, the number
4is the module's width in tiles. - The number
2is its height in tiles. - The
240is the hit points a heavy cannon has. After taking 240 damage, it will be greyed out and unusable. 150is the number of hit points below which the module might catch fire. A heavy cannon is somewhat flammable, but not very.800is the number of milliseconds it takes a crewman to walk through one of the module's tiles. 800 is standard for modules that aren't meant specifically as passageways. In comparison, a corridor module has a value of 350.- Finally,
160is the module's weight. - After that, the
app().frame(0, 11, 4, 2)defines where on the sprite sheet to find the module's sprite. Since modules are 16 pixels across, this actually refers to a rectangle ofx=0, y=176, w=64, h=32.
Then we get to the weapon-specific information:
Reload: The time the cannon takes to reload, in ms.Clip: How many units of ammo the cannon can store before needing new ammunition delivered.Jitter: How inaccurate the cannon is.0.5/300means that after 300 pixels of flight, the shot will have gone off-course by half a tile, which is pretty accurate.Blast Damage: The amount of blast (explosive/fire) damage the projectile does.0because the cannon fires a non-explosive projectile.Penetration Damage: The amount of penetration damage.100, which is the largest amount of damage any weapon does in one shot. We will change that with our new, absurdly large cannon.FireArc: How much the weapon can be rotated to aim. Here, the arc is sixty degrees, so up to thirty degrees down or up.mzCX, mzCY: Sounds like gibberish, I know. The x/y position of the point around which the barrel rotates, expressed in units of one tile. So the center of rotation for the heavy cannon's barrel is 45 pixels from the left and 23 pixels from the top of the module.mzL: More gibberish. The length of the barrel, measured from the rotational center, in units of one tile. So in a heavy cannon, the barrel extends 20 pixels from the center of rotation. All these numbers will obviously change for our bigger gun.Sound: Making more sense again, the sound the weapon makes when it fires.NumSounds: The number of different firing sounds, in this case three, which means the actual sound files are calledhv_cannon0.ogg,hv_cannon1.ogg,hv_cannon2.ogg. For our superheavy cannon, we can probably just use the same sounds.HitSound: The sound, if any, the projectile makes when it impacts. Used for grenades to go bang when they hit. Not needed here -- the destruction the cannonball causes will make plenty of noise on its own.OptimalRange: The optimal range at which this weapon should be used. Used by the AI for positioning.
Then there's some details about what the weapon looks like:
shot(new Img("spritesheet", 0, 304, 10, 5, false)): Where to find the shot sprite in the spritesheet. Unlike before, these coordinates are in pixels, as shots don't come in sizes multiple of 16!shotEmitter(new Particle.Emitter(Type.TRAILING_SMOKE, 0.007)): This means that there's a 0.7% chance every frame that the shot will emit a bit of trailing smoke while in flight.barrel(new Img("spritesheet", 151, 196, 40, 9, false), new Pt(25, 19), 4): This is probably the trickiest one. The first part locates the picture of the weapon barrel. The thing to notice about these coordinates is that they're 40 pixels wide, so exactly twice as much as the twenty pixels the barrel extends by. For simplicity's sake, all barrel sprites in Airships rotate around their center. So even though visually a barrel may rotate around a point that's not in the center of the image, we correct for this by adding a bunch of empty space to the image. The second part is the offset of the barrel image when it's in horizontal position. This number can actually be calculated: it's the center of rotation (see above) minus half the width and height of the barrel. So (45, 23) - (40, 9) / 2 = (25, 19). Finally, the 4 is just the width of the module in tiles, like above. All of these numbers combine to place the barrel sprite in the right place and rotate it around the right point. Don't worry if this seems a bit much, we'll go over the numbers for our superheavy cannon once we've created the sprites for it.recoil(8): The number of pixels by which the barrel is pushed back by recoil when it fires.
Right! Now there's just a few more things.
explode(80, 100): When the cannon reaches less than 80 HP, it may explode, doing 100 HP damage to adjacent modules.windows(0,0, 2,1): Where on the module there are windows. Expressed as pairs of x/y coordinates, so there's a window atx=0, y=0in the top-left tile, and one atx=2, y=1in the third tile on the bottom.crew(2): This module requires two crew to operate.recommendedCrew(3): It's recommended that this module has three crew available - one extra to carry the ammo.recommendedGuards(1): It's recommended that this module be guarded by one air marine.canOccupy(0,1, 1,1, 2,1, 3,1, 0,0): The tiles where crew can stand, again as pairs of x/y coordinates. The heavy cannon module is two tiles tall and has a ladder at the far left, which means that all the tiles at the bottom(0,1, 1,1, 2,1, 3,1)and the tile at the top left(0,0)are accessible, but the three tiles in the top right that don't have a ladder are not.cost(200): The module costs 200 gold.upDoors(true, false, false, false): Which tiles at the top have a hatch leading up. Since there's a ladder at the far left, the one at the far left does, but none of the others do.required(Bonus.HEAVY_CANNON): In strategic mode, some modules are only available once you've acquired a city that can build them. The heavy cannon is one of those, so it requires that your empire has the HEAVY_CANNON bonus.isCannon()andisGun(): Specifies that the weapon is a type of cannon, and also a type of gun. Used for certain bonuses.desc: The module's description.
That's everything! All this information put together completely defines the heavy cannon module. Now we can start changing things around for our superheavy cannon.
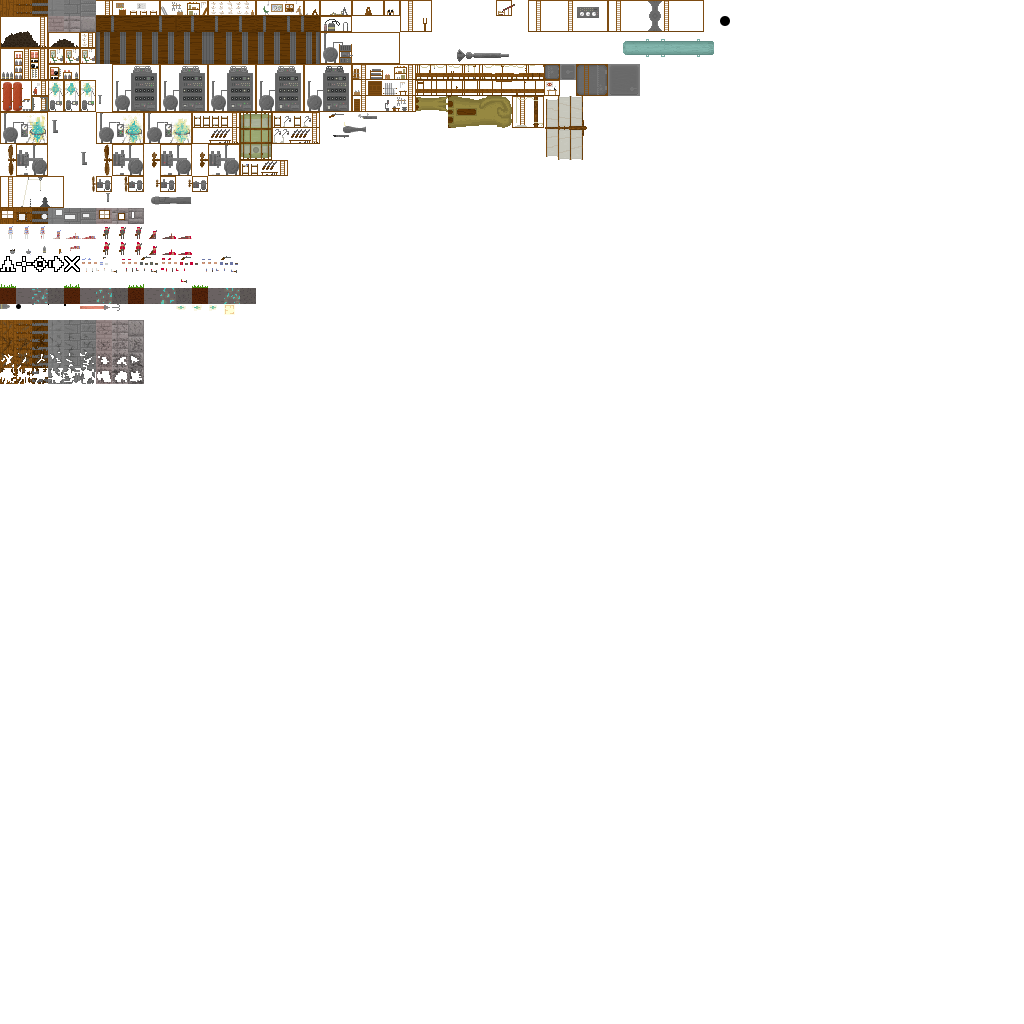
But first, let's draw the necessary art. To do this, have a look at the spritesheet.png file found in src/com/zarkonnen/airships/images. To make things easier, I suggest creating a temporary layer underneath with a checkerboard 16x16 pixel pattern, which will let you see where the tile boundaries are.
![]()
So the heavy cannon is a 4x2 module with a barrel length of 40px. For our crazy gun, we want to scale this up considerably, so let's make it a 6x2 module. First, let's find some empty space on the sprite sheet, say in the top row to the right, just after the module sprite for the suspendium cannon.
![]()
And in fact, let's just copy that module sprite, get rid of the sciency panel, and make it wider by one tile. Our giant cannon needs to be anchored rather thoroughly, so we add a metal mount for it, too:
![]()
Having drawn the mount, we can measure the offset of the barrel's center of rotation, which is one of the numbers we need to set things up correctly. In this sprite, the center of rotation is 47 pixels from the left and 16 pixels from the top.
Next, let's draw the barrel, making it the kind of greenish copper colour of the Tsar Cannon:
![]()
For ease of alignment, I've put it right below the module sprite, in the correct horizontal position.
![]()
Now we can measure the dimensions of the barrel. The picture itself is 91 pixels long and 18 pixels tall. But remember that it will rotate around the center of the sprite. This means that the barrel sprite's center needs to horizontally line up with the center of the barrel mount. To get that effect, the barrel sprite ends up being 118 pixels wide, since the barrel is actually rotating around a point somewhat to the left of its center.
Finally, we also need the ludicrous cannon ball this thing spits, ten pixels across:
![]()
As with the modified .class files, we can simply put our modified spritesheet.png into the correct location to override the original. For now, just replace the one in the game source.
Now we can get started with creating the entry for this new weapon, which we shall dub the "Imperial Cannon", in reference to its inspiration. First, simply duplicate the whole entry for HEAVY_CANNON and rename it IMPERIAL_CANNON. THen go over each of the values we looked at before and modify them for our needs.
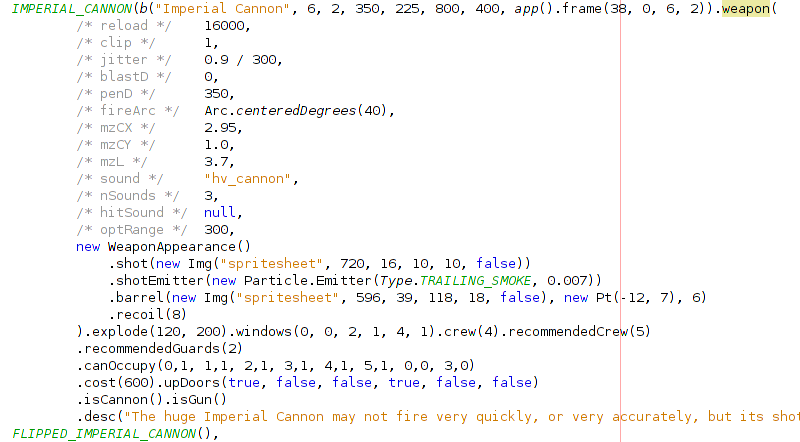
Name:"Heavy Cannon" -> "Imperial Cannon"Module Width:4 -> 6Module Height:2 -> 2Hit Points:240 -> 360-- The module is 50% bigger.Fire Hit Points:150 -> 225Move Delay:800 -> 800-- The standard.Weight:160 -> 400-- The Imperial Cannon is an absurdly heavy lump of metal.Module Sprite:(0, 11, 4, 2) -> (38, 0, 6, 2)-- The module sprite is atx=608, which is 38 x 16.Reload:7000 -> 16000-- Sixteen seconds!Clip:1 -> 1Jitter:0.5/300 -> 0.9/300-- Somewhat worse than a normal cannon. The Imperial Cannon isn't very accurately made.Blast Damage:0 -> 0Penetration Damage:100 -> 350-- Huzzah! Long live the Emperor! This will tear straight through weaker ships.Fire Arc:Arc.centeredDegrees(60) -> Arc.centeredDegrees(40)-- Not very aimable, though.mzCX:2.8 -> 2.95-- How do we end up with this number? It's because we measured the center of rotation of the barrel to be 47 pixels from the left. 47 / 16 is approximately 2.95.mzCY:1.45 -> 1.0-- Vertical center of rotation is 16 pixels offset.mzL:1.25 -> 3.7-- How do we get this one? Well, the whole barrel sprite is 118 pixels wide, so the length of the barrel from the rotational center is half that, so 59. Divide by 16, and you end up with about 3.7.Sound:"hv_cannon" -> "hv_cannon"NumSounds:3 -> 3HitSound:null -> nullOptimalRange:800 -> 300-- On the basis that it's a whole lot less accurate.shot(new Img("spritesheet", 0, 304, 10, 5, false)) -> shot(new Img("spritesheet", 720, 16, 10, 10, false))-- The sprite for the cannon ball.shotEmitter(new Particle.Emitter(Type.TRAILING_SMOKE, 0.007)) -> shotEmitter(new Particle.Emitter(Type.TRAILING_SMOKE, 0.007))-- Leave that as is.barrel(new Img("spritesheet", 151, 196, 40, 9, false), new Pt(25, 19), 4) -> barrel(new Img("spritesheet", 596, 39, 118, 18, false), new Pt(-12, 7), 6)-- As previously discussed, the barrel sprite is 118 pixels wide and 18 pixels tall, with a bunch of extra blank space to the left to make it rotate around the right point. From this, we can calculate the offset of -12 and 7. The horizontal offset of the center of rotation is 47 pixels. Subtract from this half the barrel sprite width, and you end up with -12. Don't worry that it's a negative number: there's nothing there in that end of the barrel sprite, so it's not going to draw the cannon sticking out the back. The vertical offset is 16 - 18 / 2 = 7, which makes sense: a barrel 18 pixels high centered horizontally in a module 32 pixels high is seven pixels from the top. Finally, that 6 at the end is just the width of the module in tiles. That wasn't so bad in the end, right?recoil(8)->recoil(12)-- Bigger gun means more recoil!explode(80, 100)->explode(120, 200)-- Adjusting the explosion point upwards by 50% in line with the increased hit points, but doubling the explosion damage, because if this thing goes, it's not going to be pretty.windows(0, 0, 2, 1)->windows(0, 0, 2, 1, 4, 1)-- Let's add another window along the bottom.crew(2) -> crew(4)-- Such a monstrosity requires a lot of crew.recommendedCrew(3) -> recommendedCrew(5)-- Plus one more for ammo carrying.recommendedGuards(1) -> recommendedGuards(2)-- We really don't want this one disrupted by boarders.canOccupy(0,1, 1,1, 2,1, 3,1, 0,0) -> canOccupy(0,1, 1,1, 2,1, 3,1, 4,1, 5,1, 0,0, 3,0)-- All six tiles on the bottom are occupable, and so are the two tiles which have ladders.cost(200)->cost(600)-- A majestic weapon with a majestic price tag.upDoors(true, false, false, false) -> upDoors(true, false, false, true, false, false)-- There is a second ladder, which means a second hatch upwards..required(Bonus.HEAVY_CANNON)-- Get rid of this line. Anyone can build our magnificent weapon!isCannon().isGun() -> isCannon().isGun()-- Still a cannon, and a gun.desc("Slow-firing but devastating. Not even the strongest armour stands a chance.") -> desc("The huge Imperial Cannon may not fire very quickly, or very accurately, but its shots tear ships apart.")-- Or some similarly grandiose statement.
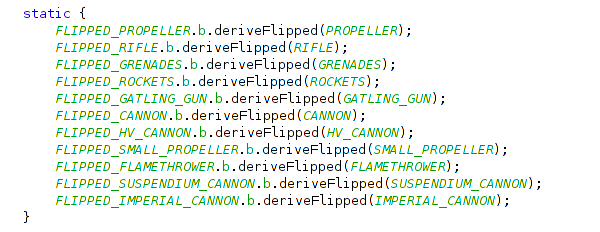
One more thing! Weapons in Airships generally come in a flipped variant pointing left, and this one should be no exception. Thankfully, the game can automatically derive the flipped stats. To get the flipped version, add a line saying FLIPPED_IMPERIAL_CANNON(), after the definition, then add the line FLIPPED_IMPERIAL_CANNON.b.deriveFlipped(IMPERIAL_CANNON); after FLIPPED_SUSPENDIUM_CANNON.b.deriveFlipped(SUSPENDIUM_CANNON);.
That's it! We've added a new type of weapon to the game, and it's time to try it out. Start up Airships and enter the Ship Editor!
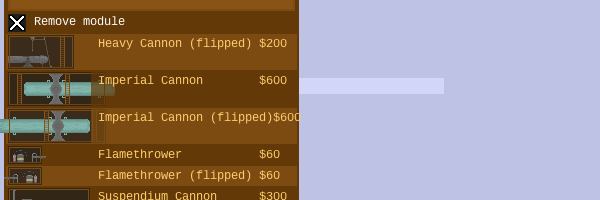
And there it is! So huge that it breaks the layout of the editor. Oh well. Let's try it out on a modified HMS Unmatched:
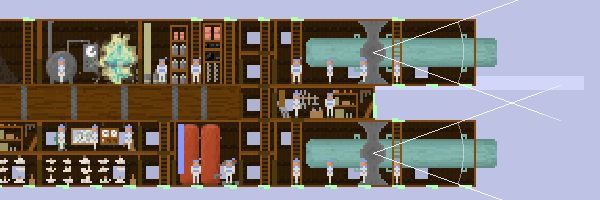
Magnificent.
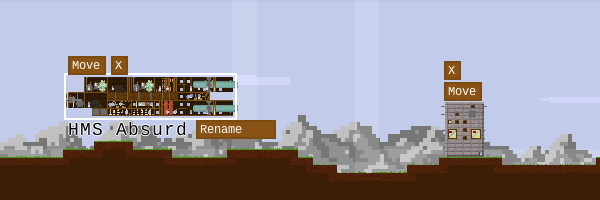
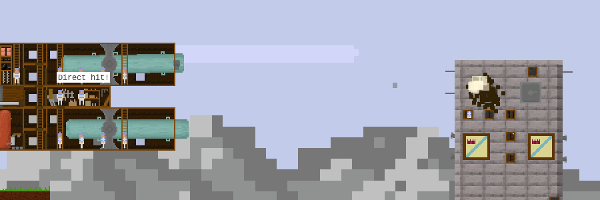
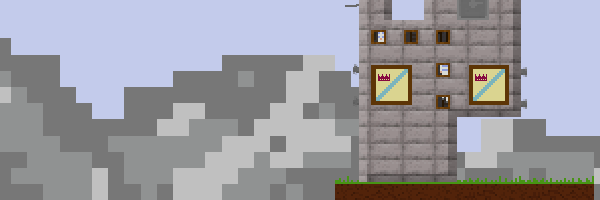
Let's try it out on this unsuspecting tower:
And indeed, it proves pretty effective at tearing off whole bits:
Now we've got this working, what's left is packaging it up as a mod. To recap, we've touched two things: the ModuleType enum, and spritesheet.png. So the complete mod should consist of a com folder that contains the ModuleType.class files (again, there are several) and the spritesheet.png file, like so:
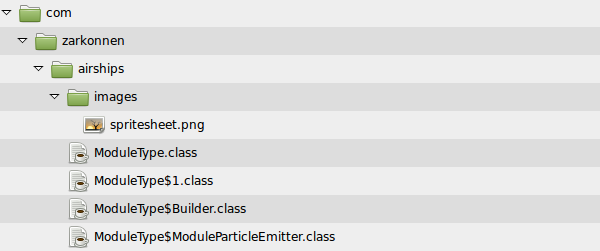
You can then drop that com folder into your normal version of Airships 5.2, and enjoy the new Imperial Cannon. At this point, you could zip up that com folder and make a post on the forums, announcing your new mod.
To wrap things up, here are some downloads that may be of use:
Now I'm aware that I've written a lot of words here, in an attempt to give a comprehensive account of what each bit of this mod does. Please let me know if there's something that needs better explaining, or something that's inconsistent. Also, let me know what other modding topics you'd like me to cover. By default, the next instalment is going to be more of an overview, a kind of guide showing you what's where. For now: experiment! How about making a light cannon instead, halfway between a rifle and a normal cannon? Or try adding a new type of armour.
See you on the forums!